Hey, Guys!
Okay. So here's a tutorial for a Stair Step card. I hope you like it.
I'm also entering this in the Charisma Cardz challenge, which is Metal. My metal object is the butterfly charm.
Well, here's the tutorial!
You will need:
A paper cutter
A scoring board
Two 12 x 12 sheets of patterned paper.
One 12 x 12 sheet of white cardstock.
A ruler (Optional. You could use the ruler on your paper cutter if you wanted.)
Some type of adhesive. (I used Mounting Squares, Dimensional Dots, and Glue Dots)
Embellishments of your choice. (I used ribbon, Stick on Pearls, a leaf punch, mulberry paper flowers, and a metal butterfly charm.)
Two stamps, stamped and colored.


Okay, now that the supplies are taken care of, let's get started!!!!!
First, take the white cardstock, and cut it down to 11 5/8 " x 8 1/4 " I forgot to take a picture of this step. DX
Next, score the cardstock on the scoring board at 1 ", 2" 4", 5 7/8", and 8 3/4". It should look like that. ---^
This step was probably the hardest for me. Fold it accordion style at the score marks. Up, down, up. down.
Now, take one of the sheets of patterned paper, and cut a strip 7/8" x 8 1/8"
This one will go on the bottom fold.
Cut the second strip 1 7/8" x 8 1/8"
This one will go second.
Cut the third strip 2 5/8" x 8 1/8"
Now for the last one. This one will go on top of the third one. Cut it 4 1/2" x 6"
Okay. Now for the mats on top. Cut this first one 6/8" x 8"
Cut the second one 1 6/8" x 8"
Now cut this one 2 5/8" x 8"
Now cut the last one 4 3/8" 5 7/8
Now mat them using the mounting squares.
Now that we have the measurements mapped out, you can use the embellishments. I used the ribbon on the bottom...
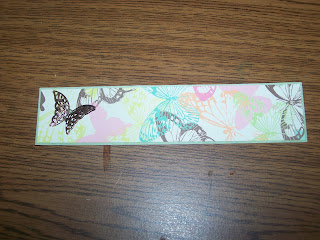
The metal butterfly on the second paper. I put a stick on pearl on the butterfly, too.
I put the stamp on the second paper, also. I popped it with the Dimensional dots.
Here's a close up.
Here's the second stamp which is going to go on the top paper.
The mulberry paper flowers are also going to go on the top paper. I also put the stick on jewels on the end of the leaves.
Like so! This step might have been a little confusing. This paper is going to go on top of the other top paper.
Now, tape the papers to the white cardstock. There's a flap in the back that will hold it up.
Here are some close-ups!
I hope you guys enjoyed this tutorial! I had a lot of fun making it.
XOXO,
Greta


No comments:
Post a Comment